Rotary Flap Peening of Aircraft Metallic Structure, Components and Parts (with Shockform Flapspeed PRO)
Rotary Flap Peening, Shockform FlapSpeed Pro, Metal Peening Training
Meets SAE and OEM SRM/SPM Standards

Course ID:
ATS2141
Level:
Intermediate
Duration:
1 days
Total Hours:
8 hrs
Classroom
3h
Practical
5h
Online
no info
Login
or
for pricing
Upcoming Training Schedules
View upcoming training sessions for this course. Contact us to reserve your spot!
Status:
Planned
Open
Full
📅
Interested in attending?
Click on any training event above to open the request form with the date automatically filled!
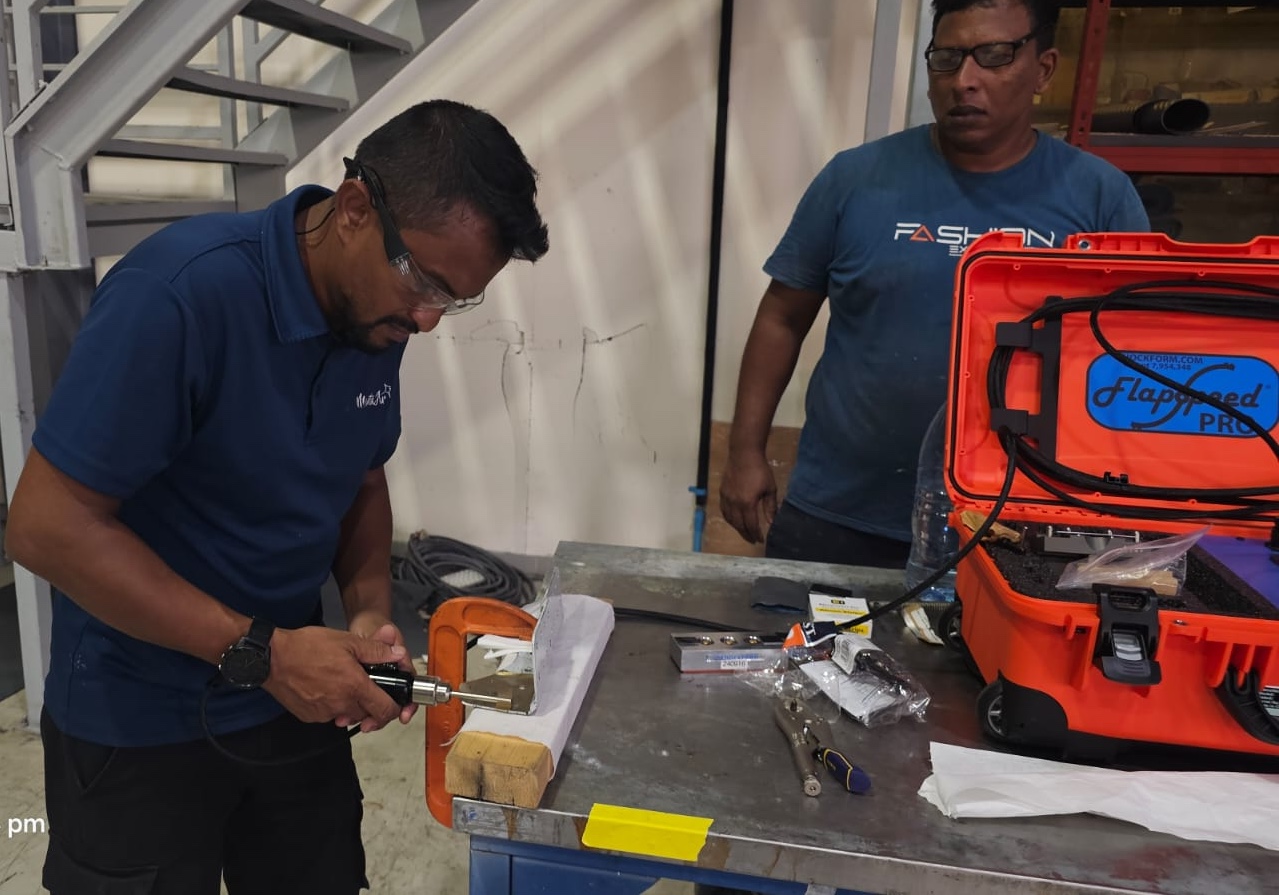
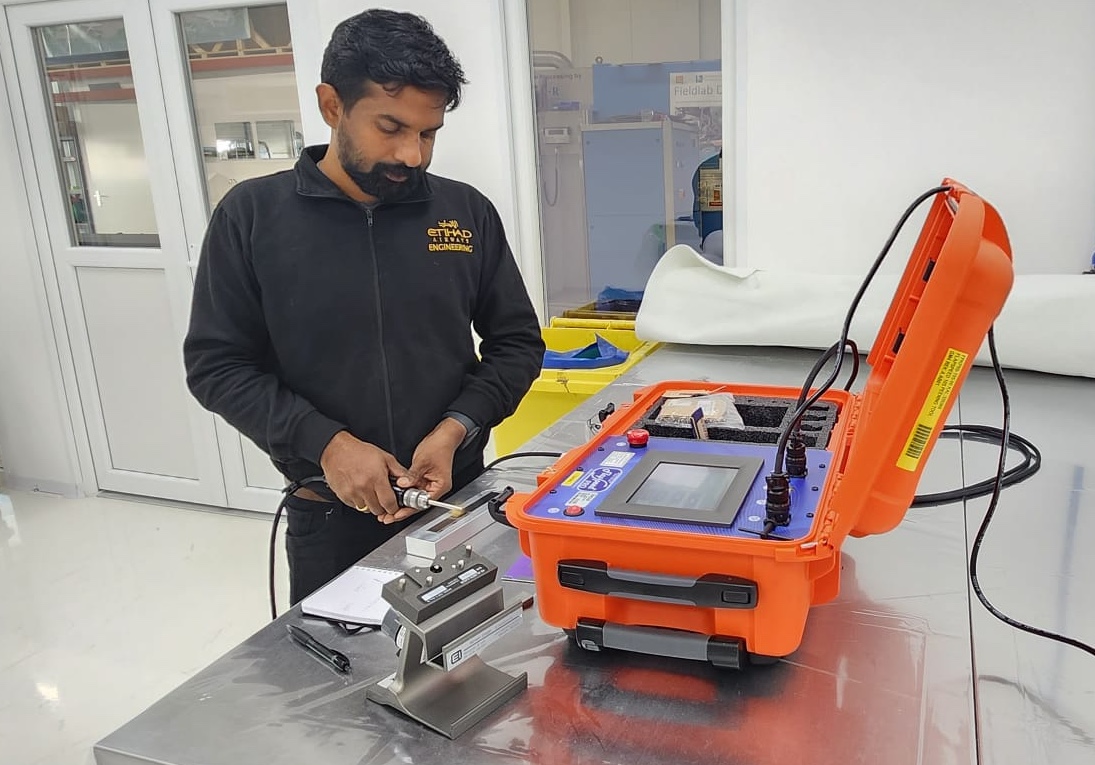
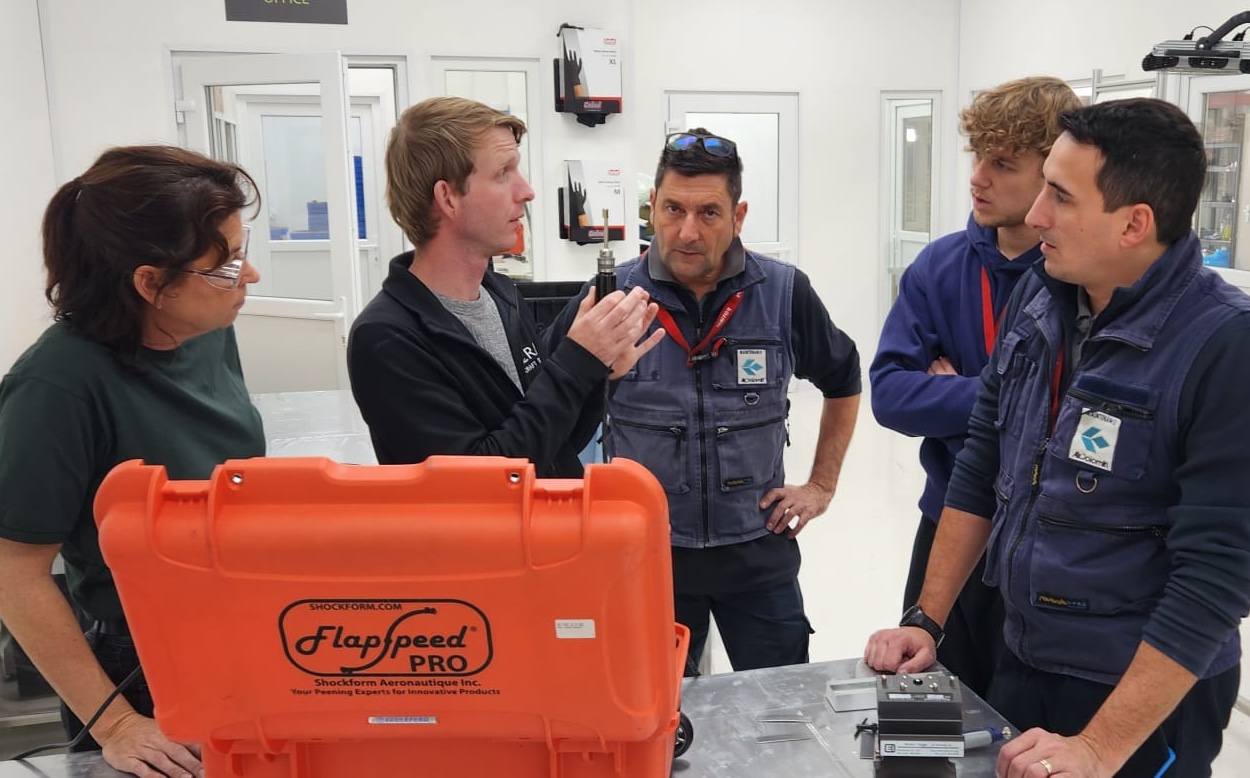
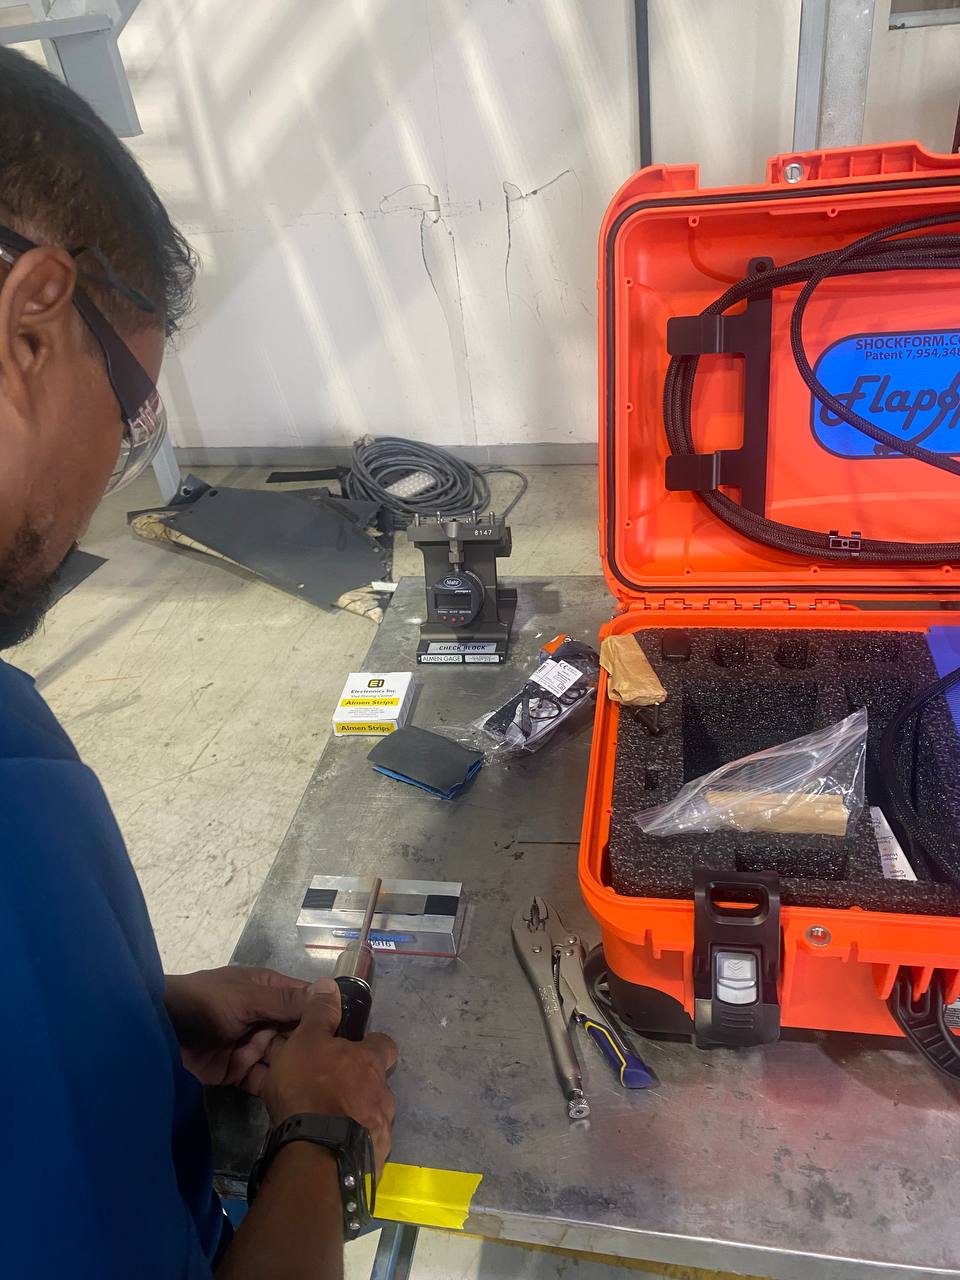
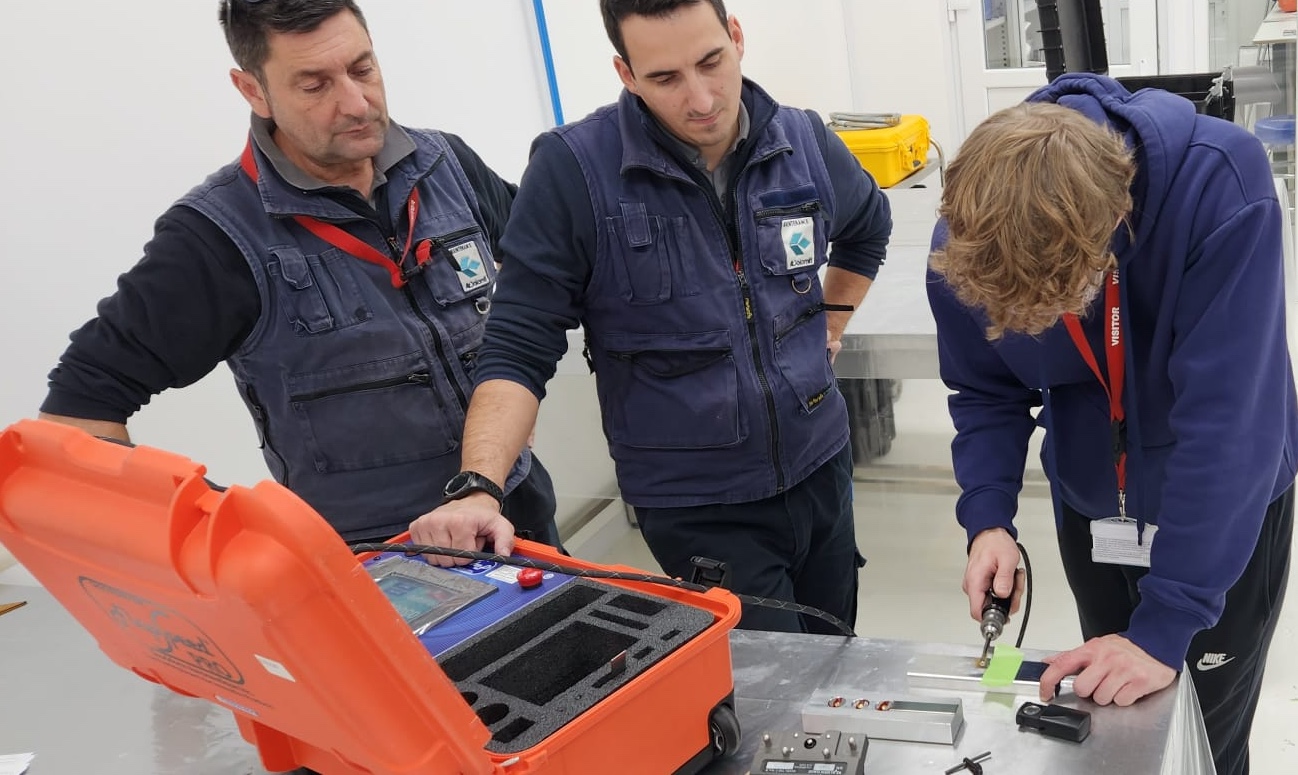
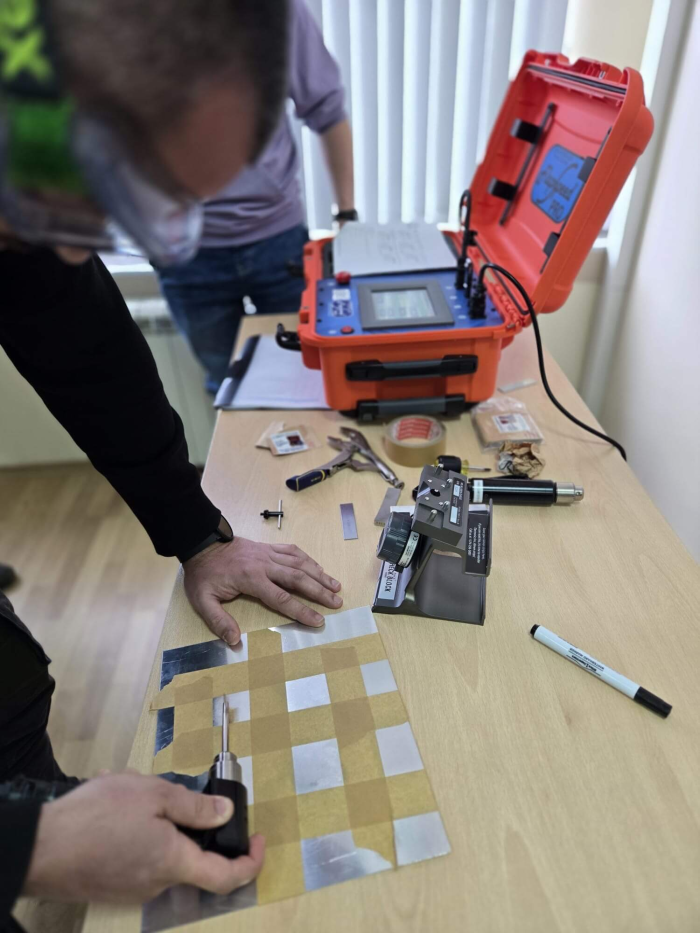
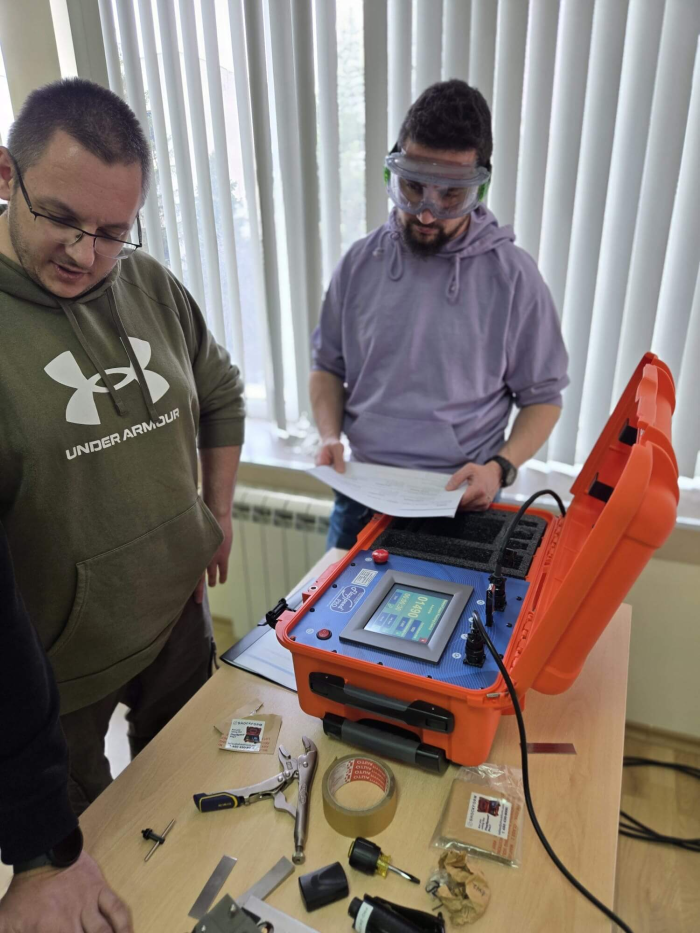
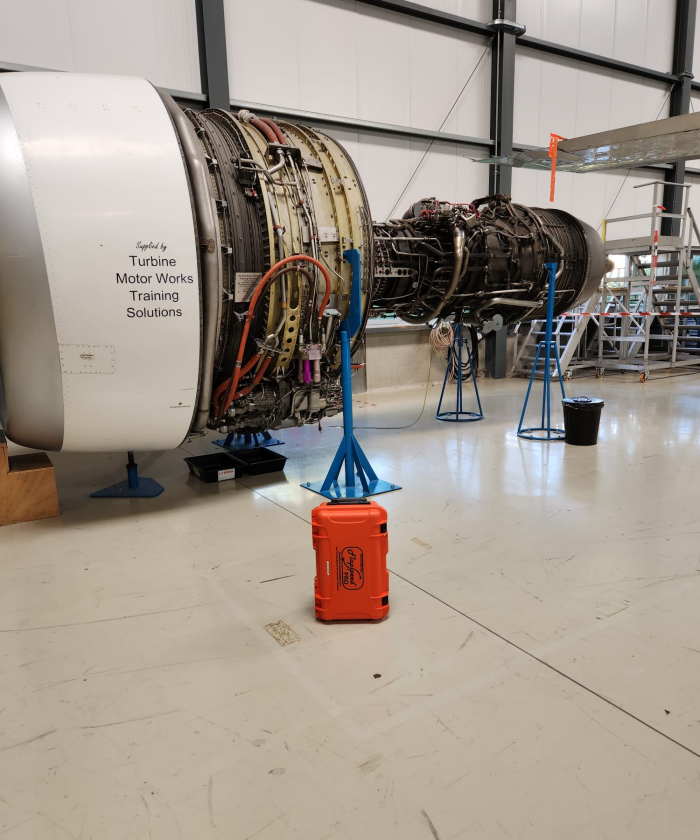
Course Gallery


For Whom
This course is tailored for individuals involved in aircraft maintenance, specifically those responsible for performing Flap Peening procedures on small areas of components or parts.
Prerequisites
Prior sheet metal or metallic training or experience is not required.
Scope and Purpose
Remaining the structural integrity of metallic surfaces Flap Peening is the Shot Peening of small areas of components or parts of the aircraft. Aircraft manufacturers demand that the person who performs the flap peening procedures is qualified and trained. This training makes sure you become qualified for the job! Not only will you become familiar with how the flap peening equipment works, but you also get an extensive explanation of the Flap Peening procedure. This course covers the theoretical and practical aspects of Rotary Flapper Peening. The participants will learn the fundamentals of flapper peening and gain practical skills by bringing it into practice. In the practical session, the participants will use a FlapSpeed® PRO to gain hands-on experience with the process while generating a saturation curve. After following this training, you will fully understand the flap peening procedure given by, for example, Airbus and Boeing.
Course Includes
* 5 Practical Hours
* 3 Theoretical Hours
* Theoretical Assignments
* Practical Assessments
* Personal Protection Equipment
* Access to the ACRATS E-learning Platform
* Training Task Logbook
* Certificate of Achievement
* 3 Theoretical Hours
* Theoretical Assignments
* Practical Assessments
* Personal Protection Equipment
* Access to the ACRATS E-learning Platform
* Training Task Logbook
* Certificate of Achievement
Additional Information
Standards
Meets SAE and OEM SRM/SPM Standards
Modules & Topics
| Module & Hours | Title & Description |
|---|---|
|
Module 1
|
Introduction and fundamentals of shot- and rotary flap peening
This module covers the fundamentals of shot peening and rotary flap peening. Participants will learn why these processes are used, how they work, and their importance in aircraft maintenance. The module explains the differences between traditional shot peening and rotary flap peening and highlights their impact on fatigue life and crack prevention in metallic structures.
Topics:
•
* 1. Introduction to Shot Peening
•
• Purpose of Shot Peening in Aircraft Maintenance
•
• Basic Principles: Impact, Cold Work, and Residual Stress
•
• Effect on Fatigue Life and Crack Growth
•
* 2. Shot Peening vs. Rotary Flap Peening
•
• Traditional Shot Peening: Process and Applications
•
• Rotary Flap Peening: Concept and Self-Contained Approach
•
• Advantages and Limitations of Both Techniques
•
* 3. Material Considerations
•
• Effects of Peening on Aluminum, Steel, and Titanium
•
• Differences in Peening Response per Material Type
•
• Surface Finishing and Post-Peening Considerations
|
|
Module 2
|
Safety and Environment
This module covers the tools, equipment, and consumables used in rotary flap peening. Participants will learn about the components of a peening setup, the differences between electric and pneumatic tools, and how to select the correct consumables. The module explains the function of key components such as mandrels, peening flaps, rotary tools (straight and 90° angle), and the magnetic Almen strip holder. Proper handling, maintenance, and storage procedures are also discussed to ensure safety and equipment longevity.
Topics:
•
* 1. Rotary Flap Peening Setup
•
• Required Tools and Equipment
•
• Electric vs. Pneumatic Rotary Tools: Advantages and Limitations
•
• Rotary Tools: Straight vs. 90° Angle Tool
•
• Mandrel: Function and Types
•
* 2. Peening Flaps and Consumables
•
• Peening Flaps: Standard vs. Reinforced
•
• Abrasive Types: Grit Selection and Impact on Peening Intensity
•
• Wear Characteristics and Replacement Intervals
•
• Factors Affecting Peening Performance
•
* 3. Equipment Handling & Maintenance
•
• Proper Tool Operation and Calibration
•
• Wear Detection and Preventive Maintenance
•
• Safe Storage and Handling of Consumables
|
|
Module 3
|
Source Documents
This module covers the key documents used in rotary flap peening. Participants will learn where to find process requirements, how to interpret specifications, and why accurate data is essential. The module explains the role of the Structural Repair Manual (SRM) and industry standards such as AMS (issued by SAE), along with how to recognize and reference outdated specifications. Additionally, it highlights the importance of work orders and their role in providing operators with the necessary process details to ensure correct and compliant peening operations.
Topics:
•
* 1. Primary Source Documents
•
• Structural Repair Manual (SRM): Role in Defining Repair Processes
•
• SAE AMS Specifications:
•
- AMS2590 – Rotary Flap Peening
•
- AMS2592 – Shot Peening
•
- J422 – Almen Strip Testing
•
- J443 – Shot Peening Coverage and Intensity
•
- J2277 – Shot Peening Terminology
•
* 2. Outdated Specifications and Correct Data Usage
•
• MIL-R-81841 and SAE AMS-R-81841A (Both Cancelled)
•
• Why Old Specifications Are Still Referenced and Why They Should Not Be Used
•
• Ensuring Compliance with Current Industry Standards
•
* 3. Peening Intensity and Engineering Drawings
•
• How Intensity Requirements May Be Specified on Technical Drawings
•
• Verifying Peening Parameters Based on Engineering Data
•
* 4. Work Orders and Process Instructions
•
• The Role of Work Orders in Guiding the Operator
•
• Essential Information That Must Be Included in a Work Order
|
|
Module 4
|
The Flap Peening Test Procedure (Peening Parameters)
This module covers the test procedure for determining the correct peening parameters in rotary flap peening. Participants will learn how to select and use Almen strips, determine peening intensity, and establish the correct RPM. They will also learn how to adjust RPM based on test results and understand why the same person who starts the test procedure must also complete it. Since peening results can vary between individuals, the verified parameters must be applied by the same operator to ensure consistency and repeatability in the process.
Topics:
•
* 1. Almen Strip Selection
•
• Types of Almen Strips (A, N, C)
•
• Strip Placement and Securing Methods
•
• Reading and Interpreting Almen Strip Deflection
•
* 2. Intensity Determination
•
• Purpose of Intensity Verification
•
• Plotting Saturation Curves for Accurate Measurement
•
• Ensuring Process Consistency Through Proper Verification
•
* 3. RPM Determination and Adjustment
•
• Relationship Between RPM, Flap Wear, and Peening Intensity
•
• First Estimated RPM Based on Source Document Guidance
•
• Fine-Tuning RPM for Correct Intensity and Coverage
•
• How Test Results Dictate Changes in RPM
•
* 4. Operator Responsibility in the Test Procedure
•
• The Test Must Be Completed by the Same Person Who Started It
•
• How Operator Differences Can Affect Test Results
•
• Applying the Verified Parameters Consistently to the Actual Component
•
* 5. Intensity Conversion
•
• When and Why Intensity Conversion Is Needed
•
• Conversion Between Different Intensity Units
|
|
Module 5
|
The Flap Peening Procedure
This module covers the complete rotary flap peening process from preparation to post-peening treatment. Participants will learn about safety considerations, pre-peening inspection, and surface preparation prior to peening. The importance of damage removal requirements and proper masking of surrounding areas is emphasized, followed by the execution of the flap peening process, including exposure time measurement. The module also covers quality assurance procedures, coverage verification, and necessary post-peening surface treatments. Finally, participants will learn about process restrictions and limitations to ensure compliance and consistent results.
Topics:
•
* 1. Safety Considerations
•
• PPE Requirements
•
• Hazards of Improper Peening Techniques
•
• Tool Handling and Workspace Safety
•
* 2. Pre-Peening Inspection and Surface Preparation
•
• Damage Removal Requirements: When and How to Assess the Area
•
• Cleaning and Degreasing Before Peening
•
• Surface Condition Requirements
•
* 3. Masking of Surrounding Areas
•
• Protecting Adjacent Surfaces
•
• Common Masking Materials and Techniques
•
• Avoiding Contamination
•
* 4. Flap Peening on the Part
•
• Setting Up the Tool and Flap Selection
•
• Exposure Time Measurement and Maintaining Consistency
•
• Correct Technique to Ensure Uniform Coverage (Deflection)
•
* 5. Quality Assurance and Inspection
•
• Coverage Verification Methods
•
• Process Documentation Requirements
•
* 6. Post-Peening Surface Treatment
•
• Cleaning and Corrosion Protection
•
• Recoating or Finishing Considerations
•
• When Additional Treatments Are Necessary
•
* 7. Restrictions and Limitations
•
• Painted Areas
•
• When Flap Peening Is Not Allowed or Not Effective
•
• Sanding or Blending Peened Area
•
• Material-Specific Considerations
|
|
Module 6
|
Reporting Requirements
This module covers the documentation and reporting requirements for rotary flap peening. Participants will learn what information must be recorded for each peened part or area and why accurate reporting is essential for traceability and quality assurance. The module also explains the role of the Quality Assurance (QA) department in maintaining records, including the proper handling and storage of Almen test strips.
Topics:
•
* 1. Required Information for Each Peened Part
•
• Part Identification:
•
- Part Name or Area Name
•
- Part Number and Serial Number
•
• Peening Process Details:
•
- Peening Intensity Required vs. Achieved
•
- Actual RPM Used
•
- Type of Flap and Tools Used
•
- Type of Test Strip Used
•
- Exposure Time
•
- Percentage Coverage Achieved
•
• Additional Data:
•
- Date of Peening
•
- Remarks on Process Deviations or Observations
•
* 2. Quality Assurance and Record Keeping
•
• Importance of Accurate Reporting for Compliance and Traceability
•
• Submission of Records to the Quality Assurance Department
•
• Retention of Almen Test Strips for Verification
•
• Consequences of Missing or Incorrect Documentation
|
|
Module 7
|
Practical Exercises
In this final module, participants will apply everything they have learned by performing the complete rotary flap peening procedure from start to finish. They will begin with the test procedure to determine intensity and RPM, followed by executing the peening process on an actual part. The exercises emphasize proper setup, precise execution, thorough inspection, and accurate reporting to ensure full process competence and quality assurance.
Topics:
•
* 1. Flap Peening Test Procedure
•
• Select Flap Based on the Area to Be Peened
•
• Select and Install the Correct Almen Strip
•
• Perform Test Peening to Determine Intensity
•
• Convert Intensity if Required
•
• Plot the Saturation Curve and Verify Intensity
•
• Adjust RPM as Required
•
* 2. Preparation for Peening
•
• Review Work Order and Source Documents
•
• Inspect the Area to Be Peened (Damage Removal Requirements)
•
• Perform Surface Preparation (Cleaning and Degreasing)
•
• Apply Masking to Protect Surrounding Areas
•
* 3. Flap Peening on the Part
•
• Maintain Consistent Exposure Time and Coverage
•
• Monitor the Peening Pattern and Uniformity
•
* 4. Quality Assurance and Inspection
•
• Check Coverage Percentage Using Standard Methods
•
• Ensure Compliance with the Required Peening Intensity
•
* 5. Reporting and Documentation
•
• Record All Required Data:
•
- Part and Serial Number (if applicable)
•
- Peening Intensity Required vs. Achieved
•
- RPM, Flap Type, and Exposure Time
•
- Percentage Coverage and Test Strip Results
•
- Date and Remarks
•
• Submit Records to the Quality Assurance Department
|
Module 1
Introduction and fundamentals of shot- and rotary flap peening
This module covers the fundamentals of shot peening and rotary flap peening. Participants will learn why these processes are used, how they work, and their importance in aircraft maintenance. The module explains the differences between traditional shot peening and rotary flap peening and highlights their impact on fatigue life and crack prevention in metallic structures.
Topics:
•
* 1. Introduction to Shot Peening
•
• Purpose of Shot Peening in Aircraft Maintenance
•
• Basic Principles: Impact, Cold Work, and Residual Stress
•
• Effect on Fatigue Life and Crack Growth
•
* 2. Shot Peening vs. Rotary Flap Peening
•
• Traditional Shot Peening: Process and Applications
•
• Rotary Flap Peening: Concept and Self-Contained Approach
•
• Advantages and Limitations of Both Techniques
•
* 3. Material Considerations
•
• Effects of Peening on Aluminum, Steel, and Titanium
•
• Differences in Peening Response per Material Type
•
• Surface Finishing and Post-Peening Considerations
Module 2
Safety and Environment
This module covers the tools, equipment, and consumables used in rotary flap peening. Participants will learn about the components of a peening setup, the differences between electric and pneumatic tools, and how to select the correct consumables. The module explains the function of key components such as mandrels, peening flaps, rotary tools (straight and 90° angle), and the magnetic Almen strip holder. Proper handling, maintenance, and storage procedures are also discussed to ensure safety and equipment longevity.
Topics:
•
* 1. Rotary Flap Peening Setup
•
• Required Tools and Equipment
•
• Electric vs. Pneumatic Rotary Tools: Advantages and Limitations
•
• Rotary Tools: Straight vs. 90° Angle Tool
•
• Mandrel: Function and Types
•
* 2. Peening Flaps and Consumables
•
• Peening Flaps: Standard vs. Reinforced
•
• Abrasive Types: Grit Selection and Impact on Peening Intensity
•
• Wear Characteristics and Replacement Intervals
•
• Factors Affecting Peening Performance
•
* 3. Equipment Handling & Maintenance
•
• Proper Tool Operation and Calibration
•
• Wear Detection and Preventive Maintenance
•
• Safe Storage and Handling of Consumables
Module 3
Source Documents
This module covers the key documents used in rotary flap peening. Participants will learn where to find process requirements, how to interpret specifications, and why accurate data is essential. The module explains the role of the Structural Repair Manual (SRM) and industry standards such as AMS (issued by SAE), along with how to recognize and reference outdated specifications. Additionally, it highlights the importance of work orders and their role in providing operators with the necessary process details to ensure correct and compliant peening operations.
Topics:
•
* 1. Primary Source Documents
•
• Structural Repair Manual (SRM): Role in Defining Repair Processes
•
• SAE AMS Specifications:
•
- AMS2590 – Rotary Flap Peening
•
- AMS2592 – Shot Peening
•
- J422 – Almen Strip Testing
•
- J443 – Shot Peening Coverage and Intensity
•
- J2277 – Shot Peening Terminology
•
* 2. Outdated Specifications and Correct Data Usage
•
• MIL-R-81841 and SAE AMS-R-81841A (Both Cancelled)
•
• Why Old Specifications Are Still Referenced and Why They Should Not Be Used
•
• Ensuring Compliance with Current Industry Standards
•
* 3. Peening Intensity and Engineering Drawings
•
• How Intensity Requirements May Be Specified on Technical Drawings
•
• Verifying Peening Parameters Based on Engineering Data
•
* 4. Work Orders and Process Instructions
•
• The Role of Work Orders in Guiding the Operator
•
• Essential Information That Must Be Included in a Work Order
Module 4
The Flap Peening Test Procedure (Peening Parameters)
This module covers the test procedure for determining the correct peening parameters in rotary flap peening. Participants will learn how to select and use Almen strips, determine peening intensity, and establish the correct RPM. They will also learn how to adjust RPM based on test results and understand why the same person who starts the test procedure must also complete it. Since peening results can vary between individuals, the verified parameters must be applied by the same operator to ensure consistency and repeatability in the process.
Topics:
•
* 1. Almen Strip Selection
•
• Types of Almen Strips (A, N, C)
•
• Strip Placement and Securing Methods
•
• Reading and Interpreting Almen Strip Deflection
•
* 2. Intensity Determination
•
• Purpose of Intensity Verification
•
• Plotting Saturation Curves for Accurate Measurement
•
• Ensuring Process Consistency Through Proper Verification
•
* 3. RPM Determination and Adjustment
•
• Relationship Between RPM, Flap Wear, and Peening Intensity
•
• First Estimated RPM Based on Source Document Guidance
•
• Fine-Tuning RPM for Correct Intensity and Coverage
•
• How Test Results Dictate Changes in RPM
•
* 4. Operator Responsibility in the Test Procedure
•
• The Test Must Be Completed by the Same Person Who Started It
•
• How Operator Differences Can Affect Test Results
•
• Applying the Verified Parameters Consistently to the Actual Component
•
* 5. Intensity Conversion
•
• When and Why Intensity Conversion Is Needed
•
• Conversion Between Different Intensity Units
Module 5
The Flap Peening Procedure
This module covers the complete rotary flap peening process from preparation to post-peening treatment. Participants will learn about safety considerations, pre-peening inspection, and surface preparation prior to peening. The importance of damage removal requirements and proper masking of surrounding areas is emphasized, followed by the execution of the flap peening process, including exposure time measurement. The module also covers quality assurance procedures, coverage verification, and necessary post-peening surface treatments. Finally, participants will learn about process restrictions and limitations to ensure compliance and consistent results.
Topics:
•
* 1. Safety Considerations
•
• PPE Requirements
•
• Hazards of Improper Peening Techniques
•
• Tool Handling and Workspace Safety
•
* 2. Pre-Peening Inspection and Surface Preparation
•
• Damage Removal Requirements: When and How to Assess the Area
•
• Cleaning and Degreasing Before Peening
•
• Surface Condition Requirements
•
* 3. Masking of Surrounding Areas
•
• Protecting Adjacent Surfaces
•
• Common Masking Materials and Techniques
•
• Avoiding Contamination
•
* 4. Flap Peening on the Part
•
• Setting Up the Tool and Flap Selection
•
• Exposure Time Measurement and Maintaining Consistency
•
• Correct Technique to Ensure Uniform Coverage (Deflection)
•
* 5. Quality Assurance and Inspection
•
• Coverage Verification Methods
•
• Process Documentation Requirements
•
* 6. Post-Peening Surface Treatment
•
• Cleaning and Corrosion Protection
•
• Recoating or Finishing Considerations
•
• When Additional Treatments Are Necessary
•
* 7. Restrictions and Limitations
•
• Painted Areas
•
• When Flap Peening Is Not Allowed or Not Effective
•
• Sanding or Blending Peened Area
•
• Material-Specific Considerations
Module 6
Reporting Requirements
This module covers the documentation and reporting requirements for rotary flap peening. Participants will learn what information must be recorded for each peened part or area and why accurate reporting is essential for traceability and quality assurance. The module also explains the role of the Quality Assurance (QA) department in maintaining records, including the proper handling and storage of Almen test strips.
Topics:
•
* 1. Required Information for Each Peened Part
•
• Part Identification:
•
- Part Name or Area Name
•
- Part Number and Serial Number
•
• Peening Process Details:
•
- Peening Intensity Required vs. Achieved
•
- Actual RPM Used
•
- Type of Flap and Tools Used
•
- Type of Test Strip Used
•
- Exposure Time
•
- Percentage Coverage Achieved
•
• Additional Data:
•
- Date of Peening
•
- Remarks on Process Deviations or Observations
•
* 2. Quality Assurance and Record Keeping
•
• Importance of Accurate Reporting for Compliance and Traceability
•
• Submission of Records to the Quality Assurance Department
•
• Retention of Almen Test Strips for Verification
•
• Consequences of Missing or Incorrect Documentation
Module 7
Practical Exercises
In this final module, participants will apply everything they have learned by performing the complete rotary flap peening procedure from start to finish. They will begin with the test procedure to determine intensity and RPM, followed by executing the peening process on an actual part. The exercises emphasize proper setup, precise execution, thorough inspection, and accurate reporting to ensure full process competence and quality assurance.
Topics:
•
* 1. Flap Peening Test Procedure
•
• Select Flap Based on the Area to Be Peened
•
• Select and Install the Correct Almen Strip
•
• Perform Test Peening to Determine Intensity
•
• Convert Intensity if Required
•
• Plot the Saturation Curve and Verify Intensity
•
• Adjust RPM as Required
•
* 2. Preparation for Peening
•
• Review Work Order and Source Documents
•
• Inspect the Area to Be Peened (Damage Removal Requirements)
•
• Perform Surface Preparation (Cleaning and Degreasing)
•
• Apply Masking to Protect Surrounding Areas
•
* 3. Flap Peening on the Part
•
• Maintain Consistent Exposure Time and Coverage
•
• Monitor the Peening Pattern and Uniformity
•
* 4. Quality Assurance and Inspection
•
• Check Coverage Percentage Using Standard Methods
•
• Ensure Compliance with the Required Peening Intensity
•
* 5. Reporting and Documentation
•
• Record All Required Data:
•
- Part and Serial Number (if applicable)
•
- Peening Intensity Required vs. Achieved
•
- RPM, Flap Type, and Exposure Time
•
- Percentage Coverage and Test Strip Results
•
- Date and Remarks
•
• Submit Records to the Quality Assurance Department
Top companies offer this course to their employees
This course was selected for our collection of top-rated courses trusted by businesses worldwide. Learn more